What is a Homemade Whitening Mask
A homemade whitening mask is a DIY skincare treatment designed to lighten the skin tone, reduce the appearance of dark spots, and promote a brighter complexion. These masks typically utilize natural ingredients known for their skin-lightening properties, such as lemon, yogurt, honey, and turmeric. Unlike commercial products, homemade masks allow you to control the ingredients, avoiding harsh chemicals and potential irritants. They offer a cost-effective and personalized approach to skincare, allowing you to tailor the treatment to your specific skin type and needs. By regularly incorporating homemade whitening masks into your routine, you can achieve a more radiant and even skin tone naturally. Remember to always do a patch test before applying a new mask to your entire face to check for any allergic reactions or sensitivities.
Benefits of Homemade Whitening Masks
Homemade whitening masks offer a plethora of benefits for your skin. Firstly, they are typically free from harsh chemicals, parabens, and sulfates commonly found in commercial products, making them gentler on the skin and less likely to cause irritation. Secondly, they are budget-friendly, as the ingredients are often readily available in your kitchen or at your local grocery store. Furthermore, you have complete control over the ingredients, allowing you to customize the mask to address your specific skin concerns, whether it’s hyperpigmentation, acne scars, or dullness. Many natural ingredients used in these masks, like honey and yogurt, also offer additional benefits such as hydration, exfoliation, and anti-inflammatory properties. Regular use of homemade whitening masks can lead to a brighter, more even skin tone, reduced appearance of dark spots, and a healthy, glowing complexion. Embrace the power of nature for a naturally radiant skin.
The Top 7 Homemade Whitening Mask Recipes

Discover the top 7 amazing homemade whitening mask recipes, each designed to brighten your complexion and diminish imperfections. These recipes utilize natural ingredients known for their skin-lightening and nourishing properties, providing a gentle and effective approach to achieve a radiant glow. From the soothing blend of yogurt and honey to the potent combination of lemon and turmeric, these masks cater to different skin types and concerns. Prepare to unlock your skin’s natural radiance with these easy-to-make, at-home remedies. Incorporate these recipes into your skincare routine for a brighter, more even skin tone, and a healthy, glowing complexion. Always remember to perform a patch test before applying any new mask to your entire face.
Recipe 1 Yogurt and Honey Mask
How to Prepare the Yogurt and Honey Mask
To prepare the Yogurt and Honey Mask, you’ll need two simple ingredients: plain yogurt and raw honey. In a clean bowl, mix one tablespoon of plain yogurt (Greek yogurt is ideal due to its thickness) with one teaspoon of raw honey. Ensure the mixture is well-blended, creating a smooth paste. The yogurt contains lactic acid, a gentle exfoliant that helps to brighten the skin, while honey is a natural humectant and antibacterial agent, providing hydration and soothing properties. Adjust the proportions as needed, depending on the area you want to cover. For a thicker consistency, add a bit more yogurt; for a smoother texture, add a touch more honey. Always use fresh, high-quality ingredients for the best results.
How to Apply the Yogurt and Honey Mask

Begin by cleansing your face with a gentle cleanser and patting it dry. Apply the yogurt and honey mask evenly to your face, avoiding the eye area. Use your fingertips or a soft brush to spread the mixture smoothly. Allow the mask to sit for 15-20 minutes, allowing the ingredients to work their magic. During this time, relax and avoid making facial expressions to prevent wrinkles. Once the time is up, rinse your face thoroughly with lukewarm water, ensuring all traces of the mask are removed. Pat your skin dry with a soft towel. For optimal results, apply a light, non-comedogenic moisturizer to lock in hydration. Repeat this process once or twice a week for a brighter, more hydrated complexion.
Recipe 2 Lemon and Turmeric Mask
How to Prepare the Lemon and Turmeric Mask
Create the Lemon and Turmeric Mask by combining the power of lemon juice and turmeric powder. In a clean bowl, mix one tablespoon of freshly squeezed lemon juice (use caution, as lemon can be irritating to sensitive skin) with one teaspoon of turmeric powder. The turmeric powder provides anti-inflammatory and antioxidant benefits, while lemon juice contains citric acid, a natural bleaching agent. Mix these two ingredients thoroughly to form a smooth paste. If the mixture is too thick, add a few drops of water to achieve a more spreadable consistency. Be careful not to get the mixture into your eyes. Always do a patch test before using this mask, especially if you have sensitive skin, due to the potential for irritation from the lemon juice.
How to Apply the Lemon and Turmeric Mask

After cleansing your face, apply the lemon and turmeric mask evenly, avoiding the delicate eye area. Use your fingertips or a clean brush to spread the mixture smoothly across your face. Allow the mask to sit for 10-15 minutes, allowing the active ingredients to work their magic. As the mask dries, you may experience a slight tingling sensation, which is normal. Rinse your face thoroughly with lukewarm water, ensuring all traces of the turmeric and lemon mixture are removed. Turmeric can sometimes stain the skin, so ensure you wash your face thoroughly to avoid any yellow tint. Pat your skin dry with a soft towel and apply a light moisturizer. Use this mask once a week to help brighten skin. If you experience any irritation, discontinue use immediately.
Recipe 3 Oatmeal and Milk Mask
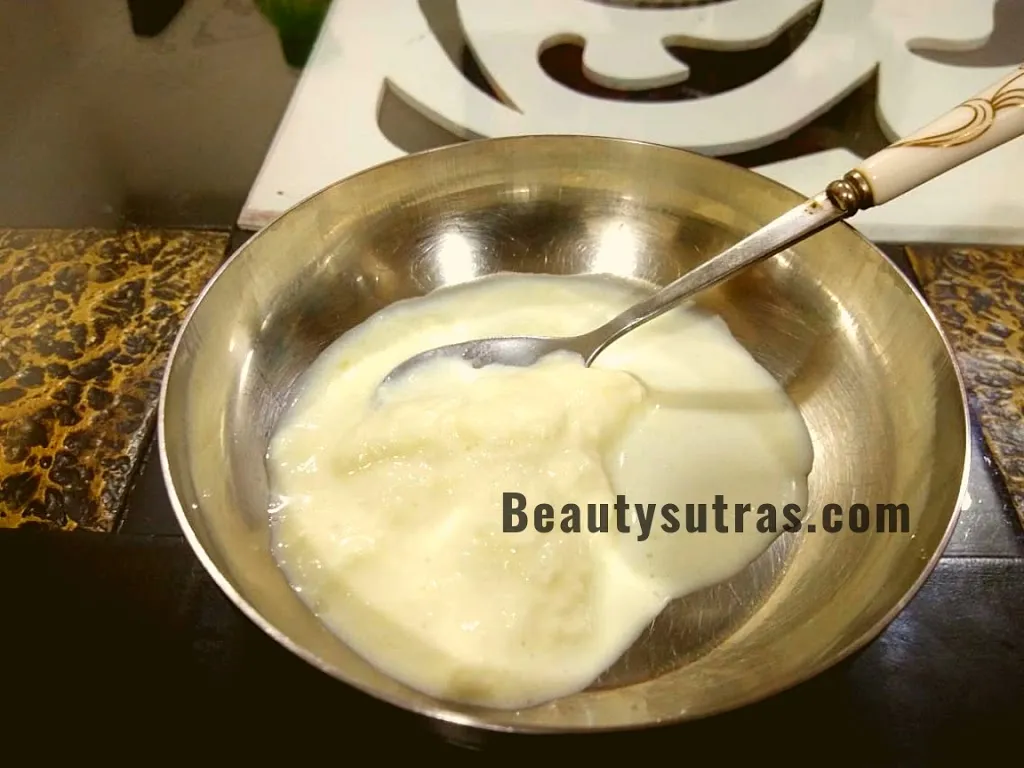
How to Prepare the Oatmeal and Milk Mask
To make the Oatmeal and Milk Mask, you’ll need rolled oats and milk. Start by grinding a small amount of rolled oats into a fine powder using a blender or food processor. In a clean bowl, combine two tablespoons of the ground oats with enough milk (any type, though whole milk is moisturizing) to form a thick paste. Allow the mixture to sit for a few minutes to soften the oats. Oatmeal has soothing and anti-inflammatory properties, while milk helps to gently exfoliate and hydrate the skin. If you prefer, you can add a teaspoon of honey for extra moisturizing benefits. The consistency should be easily spreadable but not too runny. Adjust the amount of milk to achieve your desired texture. Ensure all ingredients are fresh to prevent contamination.
How to Apply the Oatmeal and Milk Mask

Apply the Oatmeal and Milk Mask evenly to your clean, dry face, avoiding the eyes. Gently massage the mask onto your skin using circular motions for about a minute to exfoliate. The oatmeal particles will help remove dead skin cells, revealing a brighter complexion. Allow the mask to sit on your face for an additional 10-15 minutes. During this time, the oats will soothe and hydrate the skin. Rinse your face thoroughly with lukewarm water, gently removing the mask. Pat your skin dry with a soft towel and apply a light moisturizer. This mask is suitable for sensitive skin types. Use this mask once or twice a week to gently exfoliate, brighten, and soothe your skin. Always perform a patch test before first use.
Recipe 4 Rice Flour and Milk Mask
How to Prepare the Rice Flour and Milk Mask
The Rice Flour and Milk Mask utilizes rice flour, a traditional ingredient in many Asian skincare routines, known for its skin-brightening abilities. To prepare, combine two tablespoons of rice flour with enough milk (any type) to create a thick paste. If you prefer, you can use water or yogurt instead of milk. Mix the ingredients thoroughly until you achieve a smooth consistency. Rice flour helps to exfoliate the skin, remove dead skin cells, and promote a brighter complexion. The milk adds moisture, making this mask ideal for all skin types. For added benefits, you can add a few drops of honey or a pinch of turmeric powder. Make sure the mixture is free of lumps and is easily spreadable to apply to your face.
How to Apply the Rice Flour and Milk Mask

Apply the Rice Flour and Milk Mask to your clean, dry face, avoiding the eye area. Use your fingertips or a soft brush to apply an even layer. Gently massage the mask into your skin in circular motions for a minute or two to enhance exfoliation. Allow the mask to sit for about 15-20 minutes. Rinse thoroughly with lukewarm water, ensuring that all the rice flour particles are removed. Pat your skin dry with a soft towel and apply a light moisturizer. This mask is excellent for brightening and reducing dark spots, and can be used one or two times a week. Always do a patch test first to check for any adverse reactions, and discontinue use if irritation occurs.
Recipe 5 Aloe Vera and Cucumber Mask
How to Prepare the Aloe Vera and Cucumber Mask
The Aloe Vera and Cucumber Mask combines the soothing and hydrating properties of aloe vera with the cooling and brightening effects of cucumber. To prepare, blend half a cucumber (peeled) with two tablespoons of fresh aloe vera gel until you get a smooth mixture. If you don’t have fresh aloe vera, you can use commercially available pure aloe vera gel. Cucumber is rich in antioxidants and helps to reduce inflammation and skin irritation, while aloe vera is known for its healing and moisturizing properties. This mask is particularly beneficial for sunburned or irritated skin. For enhanced benefits, you can add a few drops of lemon juice (use caution, and do a patch test first). Make sure your cucumber is fresh for best results.
How to Apply the Aloe Vera and Cucumber Mask

Apply the Aloe Vera and Cucumber Mask generously to your clean, dry face, including the neck area. Avoid the eye area, as the ingredients can cause irritation. Allow the mask to sit for 15-20 minutes. The cooling sensation of the mask will soothe your skin. Rinse thoroughly with cool water. Pat your skin dry with a soft towel. This mask is best used after sun exposure or whenever your skin feels irritated or inflamed. Follow with a light, hydrating moisturizer. You can use this mask up to three times a week. It is a gentle, refreshing mask, especially good for those with sensitive or easily irritated skin. Remember, always perform a patch test first to ensure no allergic reactions.
Recipe 6 Potato Juice Mask
How to Prepare the Potato Juice Mask
The Potato Juice Mask utilizes the natural skin-lightening properties of potatoes. To prepare, peel and grate a medium-sized potato. Extract the juice by squeezing the grated potato through a cheesecloth. You should have about 2-3 tablespoons of potato juice. Alternatively, you can blend the grated potato and strain it. Potato juice is a natural source of vitamins and minerals, and helps to reduce dark spots and blemishes. For added benefits, you can mix the potato juice with a teaspoon of lemon juice or a tablespoon of honey. Ensure the potato is fresh and clean. Discard the potato juice immediately if it changes color or smells off.
How to Apply the Potato Juice Mask

Apply the Potato Juice Mask evenly to your clean face. You can use a cotton ball or your fingertips to apply it. Avoid the eye area, as the juice might cause irritation. Allow the mask to sit for 15-20 minutes. Rinse thoroughly with lukewarm water, ensuring that all traces of the potato juice are removed. Pat your skin dry with a soft towel and apply a light moisturizer. The potato juice helps to lighten the skin tone and reduce dark spots. Repeat this process two to three times a week for best results. This mask is suitable for most skin types, but it is always recommended to perform a patch test before applying it to the entire face.
Recipe 7 Baking Soda Mask
How to Prepare the Baking Soda Mask
The Baking Soda Mask provides a gentle exfoliating effect that can help to brighten the skin. To prepare, mix one tablespoon of baking soda with enough water to form a paste. The water should be added drop by drop to ensure the desired consistency. Be careful not to use too much water, as the paste should be thick enough to stick to your face. Baking soda is a natural exfoliant that can help to remove dead skin cells and reveal a brighter complexion. However, it can be harsh, so use it cautiously. For sensitive skin, it is advisable to use less baking soda and more water. Never apply this mask to broken or irritated skin.
How to Apply the Baking Soda Mask
Apply the Baking Soda Mask to your clean, damp face, using gentle circular motions. Avoid the sensitive eye area. Massage the mask onto your skin for no more than a minute, to avoid over-exfoliating. Allow the mask to sit for a few minutes. Then, rinse thoroughly with lukewarm water, making sure all the baking soda is removed. Pat your skin dry with a soft towel. Baking soda can be drying, so apply a hydrating moisturizer after use. This mask should be used sparingly, no more than once a week, due to the potential for irritation. Always do a patch test first to check for any adverse reactions and discontinue use if you experience any irritation.
Tips for Using Homemade Whitening Masks
To maximize the benefits of your homemade whitening masks, follow these helpful tips. Always start with a clean face. Thoroughly cleanse your skin before applying any mask to ensure that it can penetrate deeply. Perform a patch test on a small area of skin before applying any new mask to your entire face to check for any allergic reactions or irritation. Use fresh, high-quality ingredients to ensure the effectiveness of your masks. Apply the masks evenly and avoid the sensitive eye area. Be patient and consistent. Results may not be immediately visible, so incorporate these masks into your regular skincare routine for optimal results. Moisturize your skin after each mask application to maintain hydration and lock in the benefits. Avoid prolonged sun exposure after using any whitening mask, as your skin may be more sensitive. Protect your skin with sunscreen during the day.
Important Considerations & Precautions
Before incorporating homemade whitening masks into your skincare routine, consider these important precautions. Always perform a patch test on a small area of your skin, such as your inner arm, before applying a new mask to your entire face, to check for any adverse reactions, such as redness, itching, or irritation. If you have sensitive skin, always use gentler ingredients and limit the frequency of use. Certain ingredients, such as lemon juice and baking soda, can be harsh and should be used with caution. Avoid using whitening masks on broken or irritated skin. If you experience any adverse reactions, discontinue use immediately and consult a dermatologist. While homemade masks can be beneficial, they are not a substitute for professional dermatological treatments for serious skin conditions. Consistency is key, but moderation is important. Enjoy your glowing, brighter skin.